
 Deutsch
 English
 Türkçe
To view your orders, you need to connect shops and marketplaces by following the instructions in the Interfaces section.
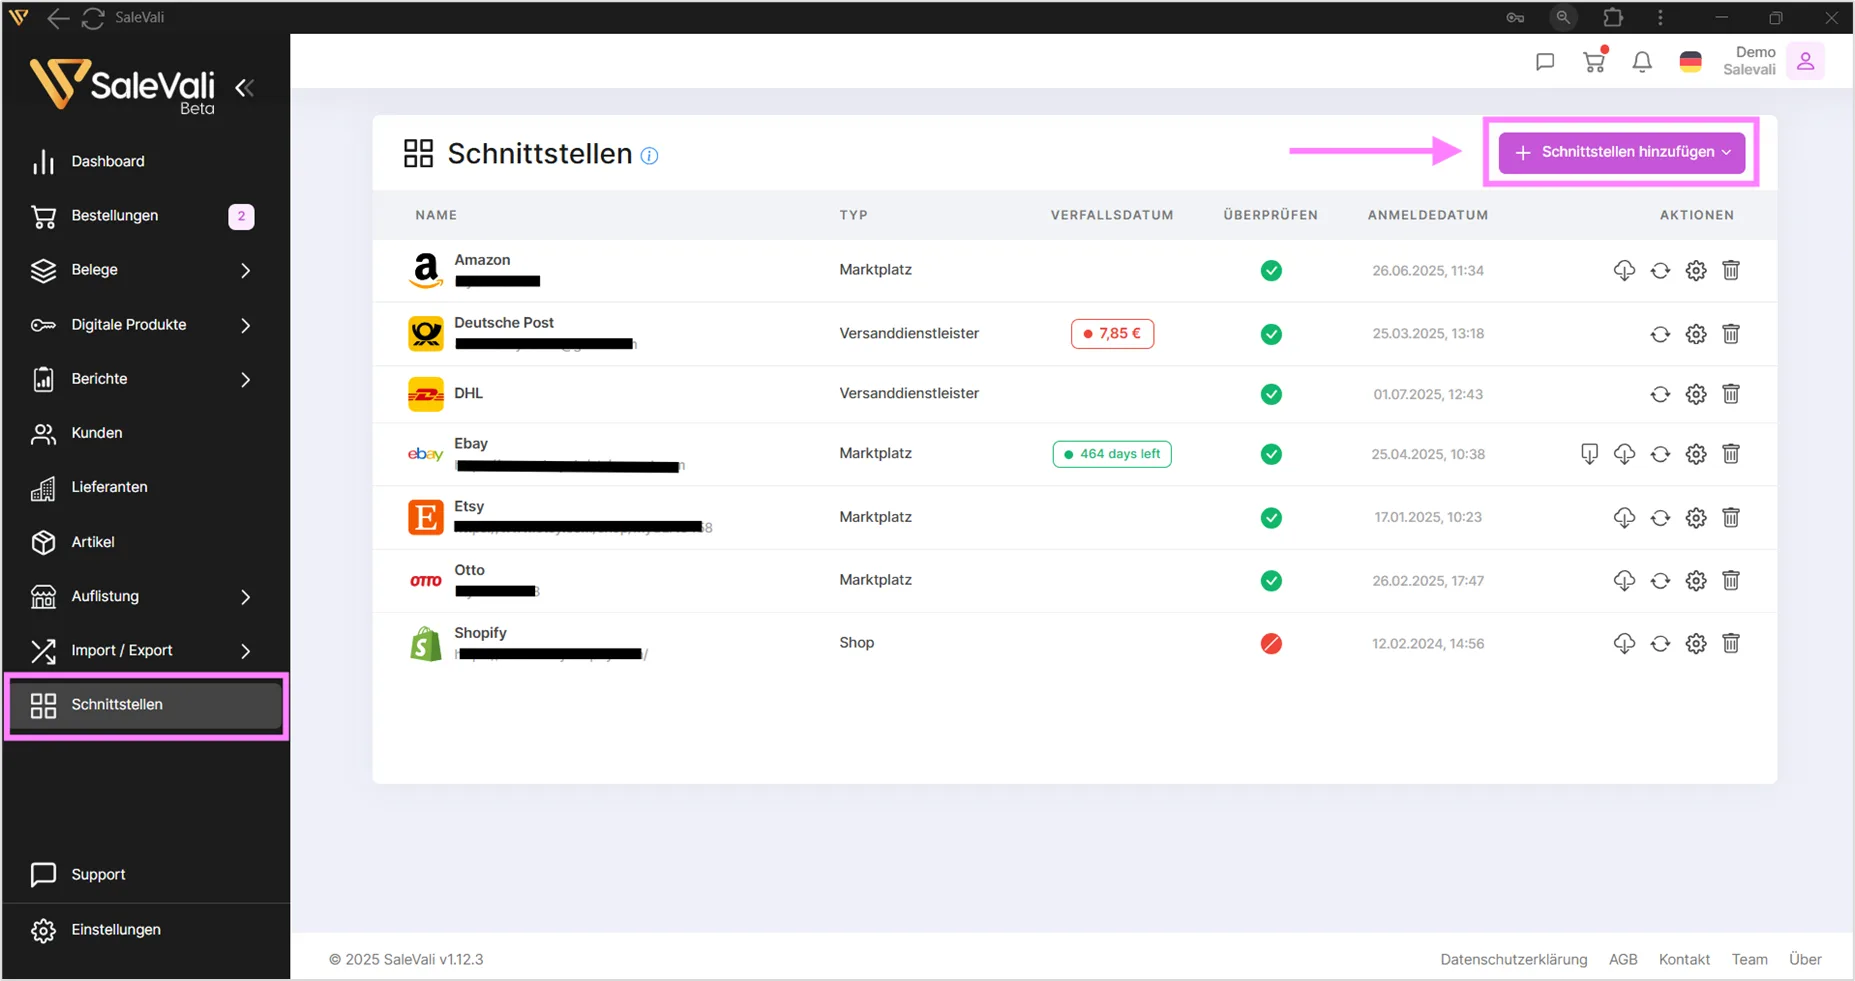
Shortly after adding shops/marketplaces, your orders will be listed in the table below.
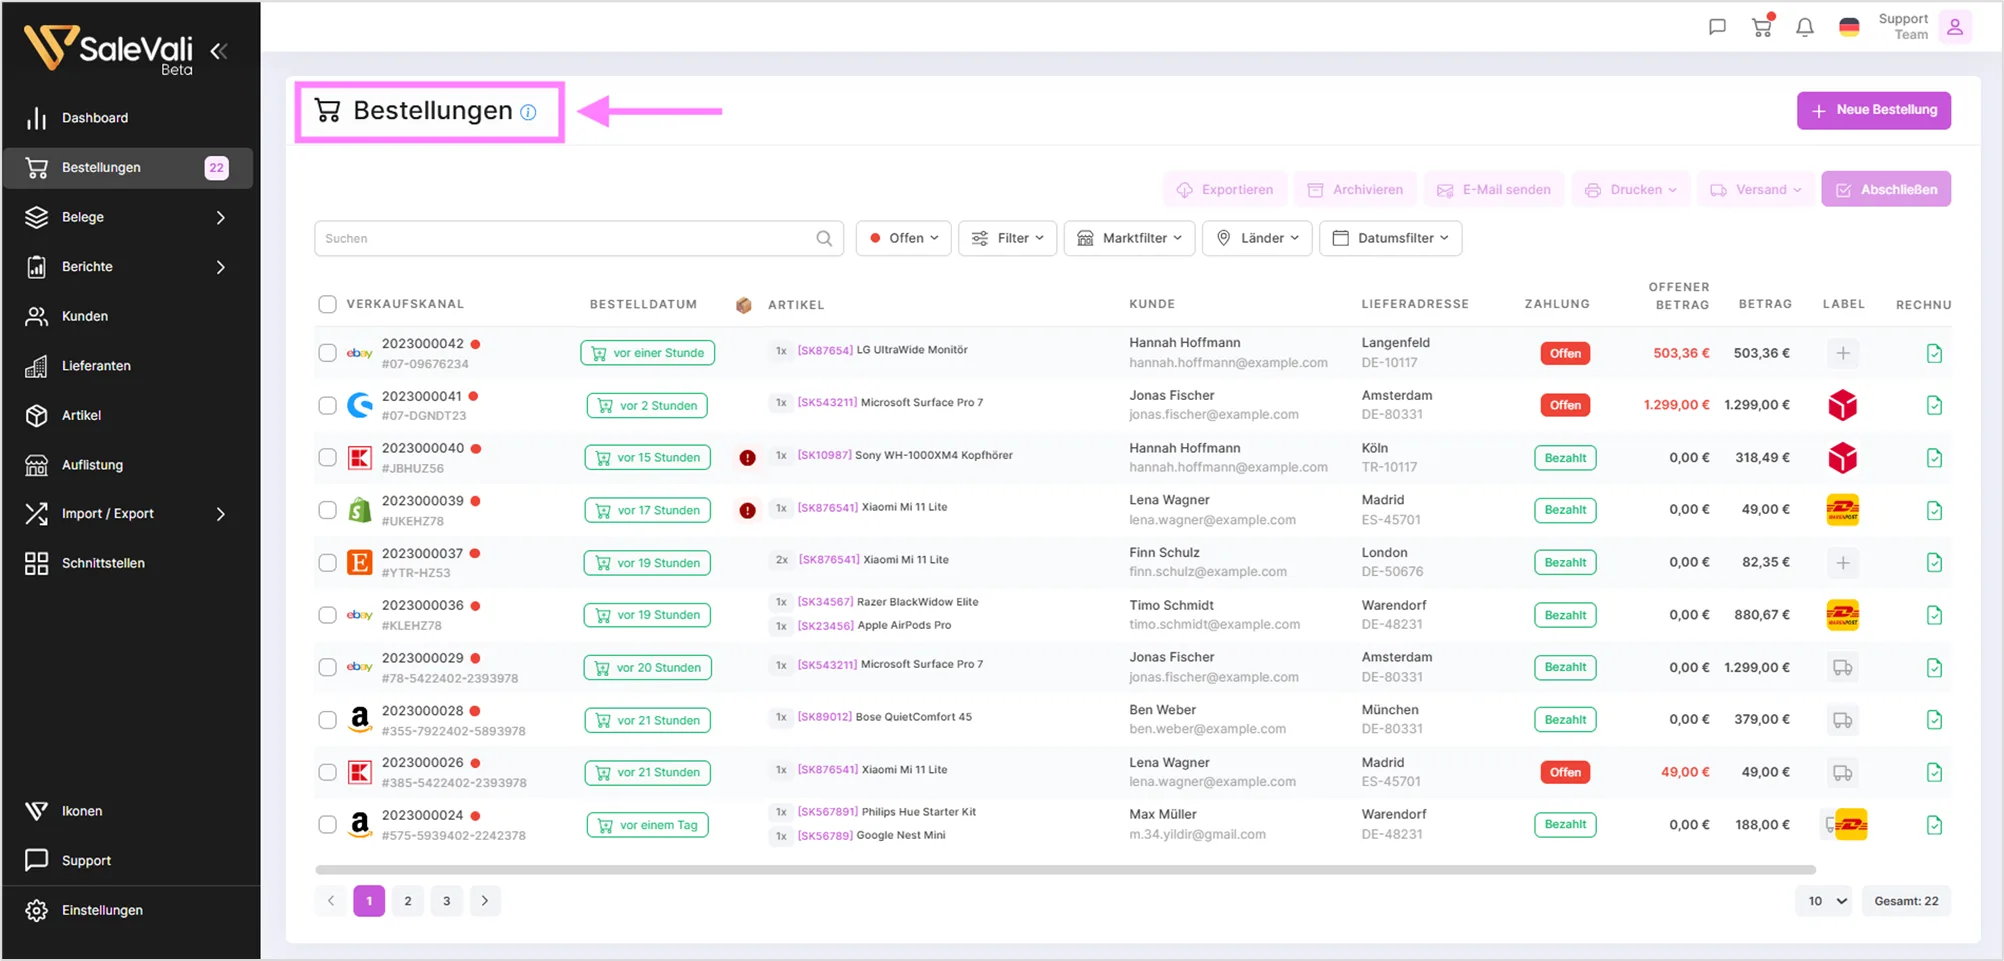
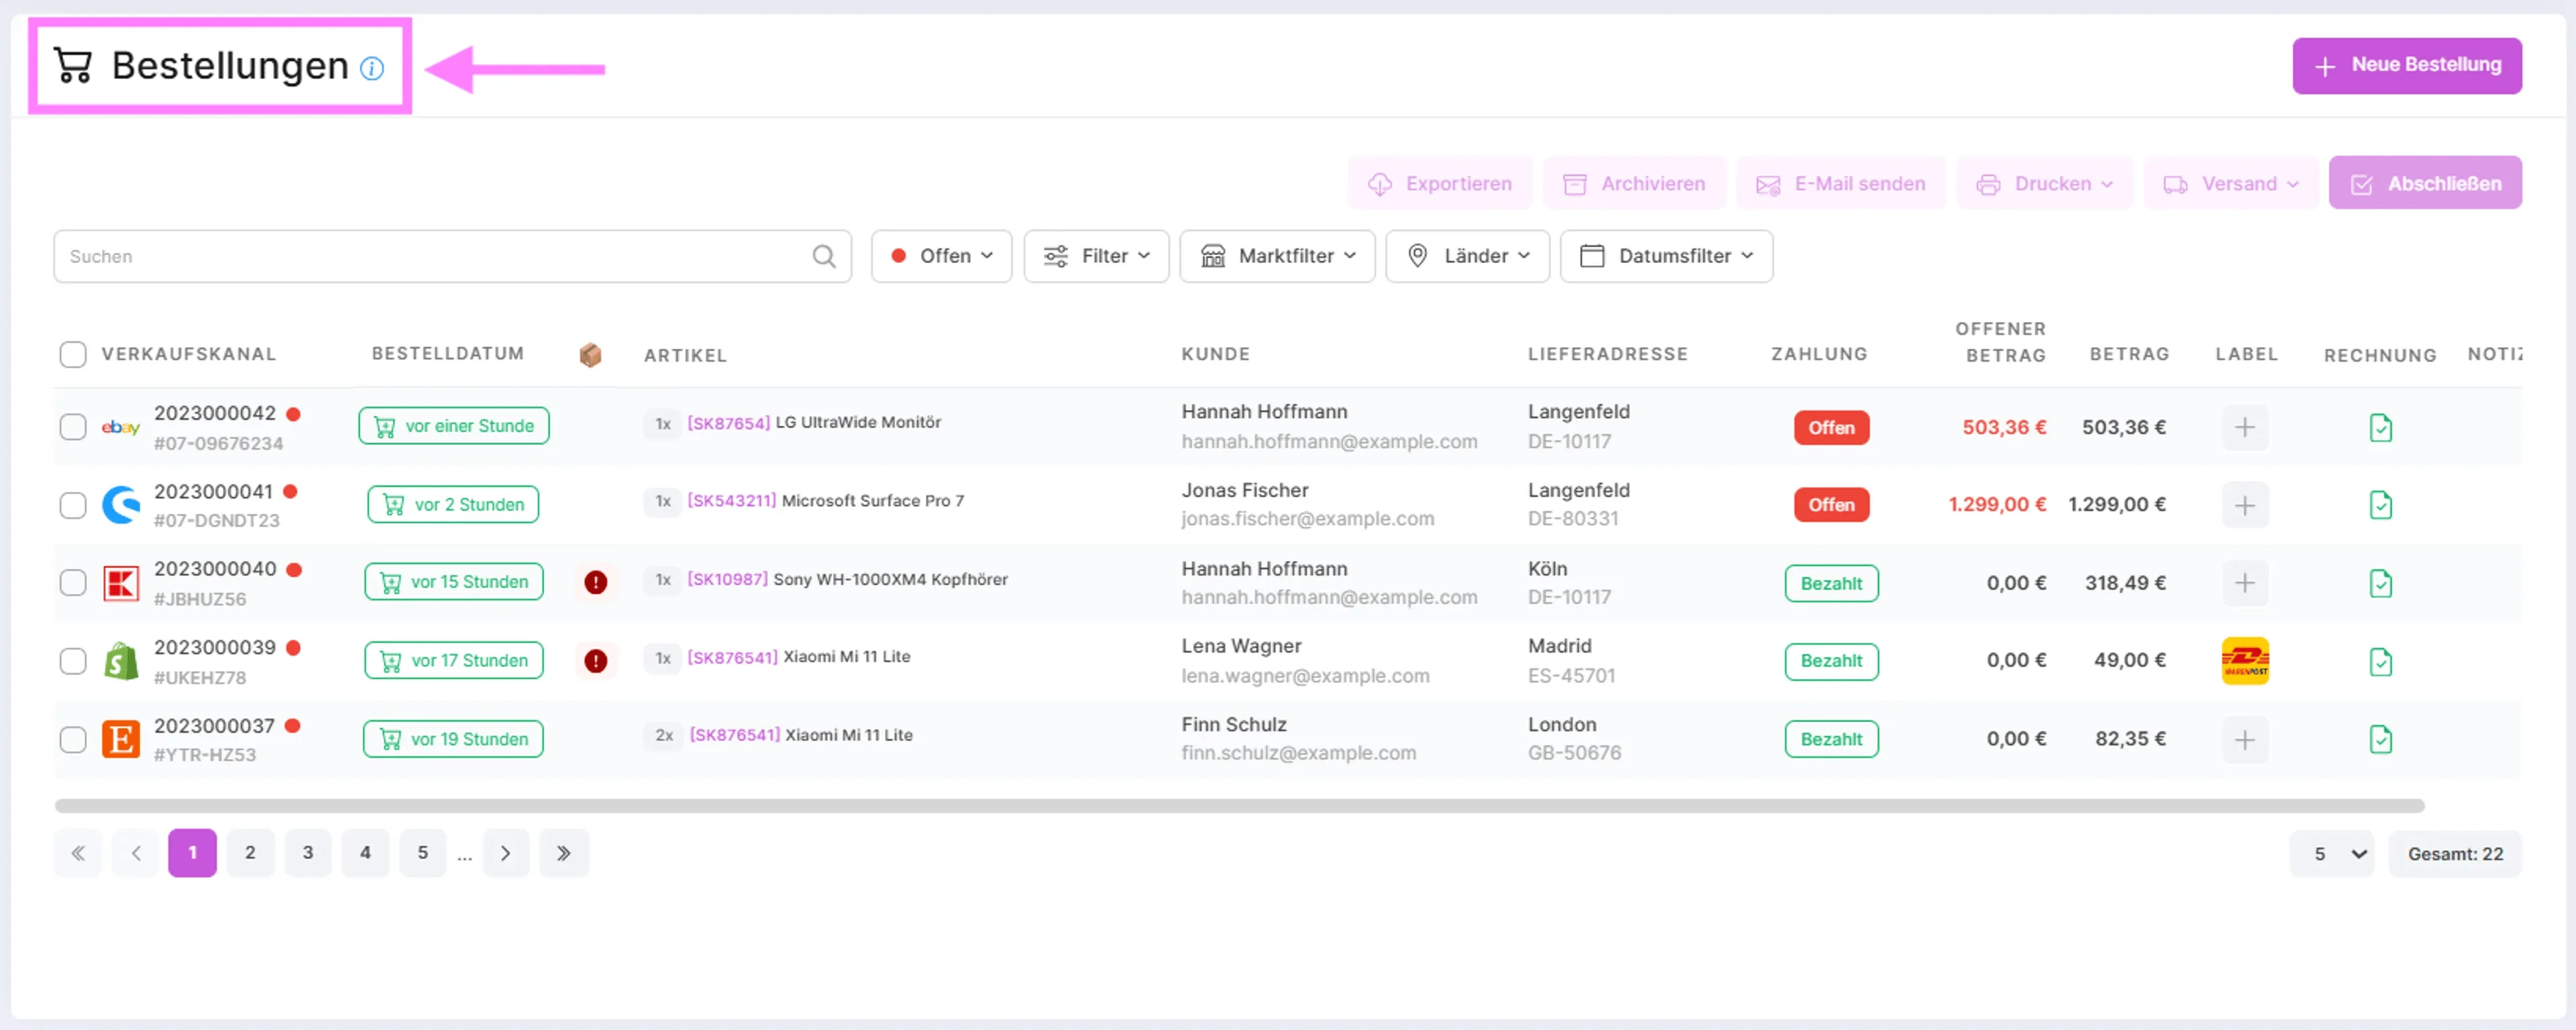
The "Orders" section provides a comprehensive overview of all received and processed orders. Here you can manage orders, track their status, and view details for each individual order.
Basic Functions
Using the basic functions in the upper right, you can easily complete incoming orders.

 | Click this button to manually create a new order in the system. This is useful for phone orders, direct sales, or other orders that are not automatically captured via integrated channels. |
 | Allows you to export the selected or filtered order data to another format (e.g. CSV, Excel) for further analysis or use in other systems. |
 | Moves the selected orders to the archive. This helps keep the active order list clean while preserving the data for historical purposes. |
 | By selecting one or more customers from the list, you can use the 'Send Email' function to send them information about the orders. |
 |
|
 | The 'Shipping' function lets you automatically create a shipping label by selecting the desired carrier. You can create shipping labels, check shipping details, and manage the shipping process for your orders.
|
 | The 'Complete' function lets you complete your order.
|
 | You can search by ID and name in the search box below. |
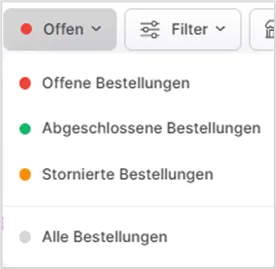 | The Status Filter lets you quickly filter the displayed orders by their status. You open it by clicking the button showing the current status (e.g. "Open") in the order overview. |
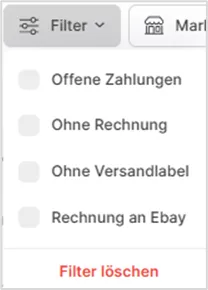 | Advanced Filter Options
|
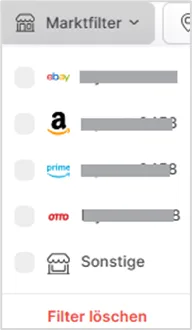 | The Market Filter lets you filter orders by the specific marketplace or sales channel through which they were received. |
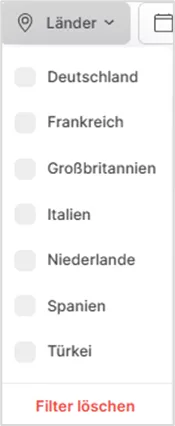 | The Country Filter lets you filter your orders by the country of the delivery address. |
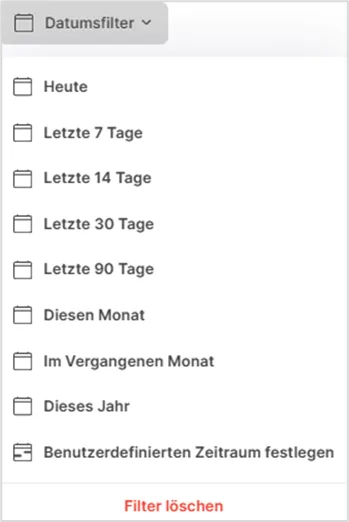 | The Date Filter lets you filter the displayed orders by their order date within predefined or custom time periods. |
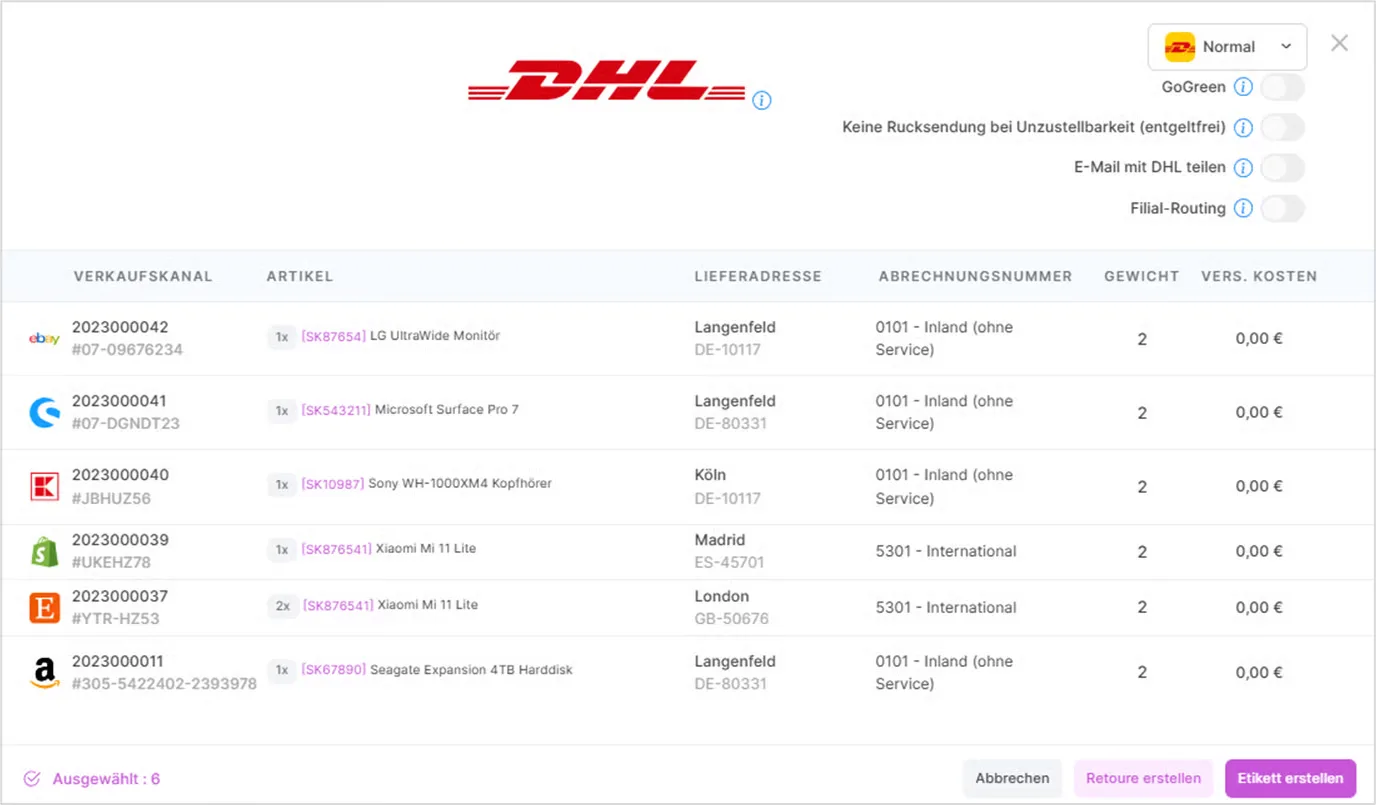
 This is a selection option or status indicating that the default shipping service (in this case DHL) is active.
 Lets you create a return label for the selected order.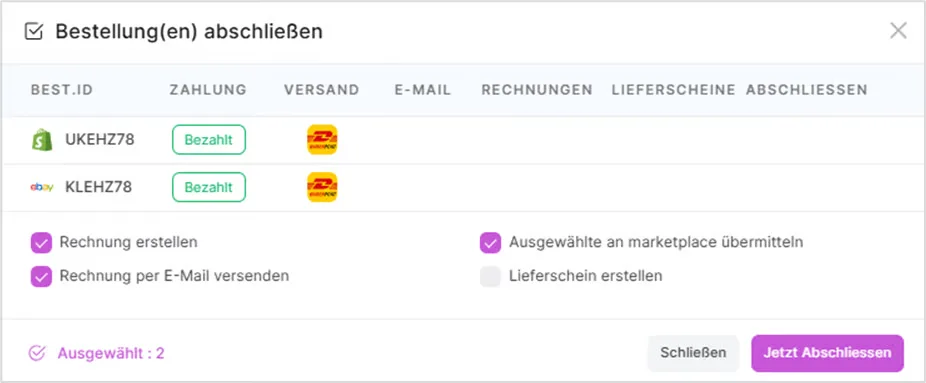
Existing or newly created orders are listed in the table below. In this area you can see the invoice ID, order date, items, customer details, delivery address, order ID, sales channel, payment method, payment status, and payment amounts. You can also sort the columns from largest to smallest or from A to Z.
 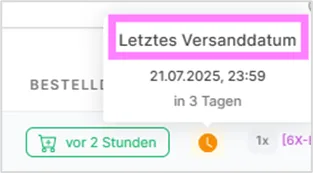 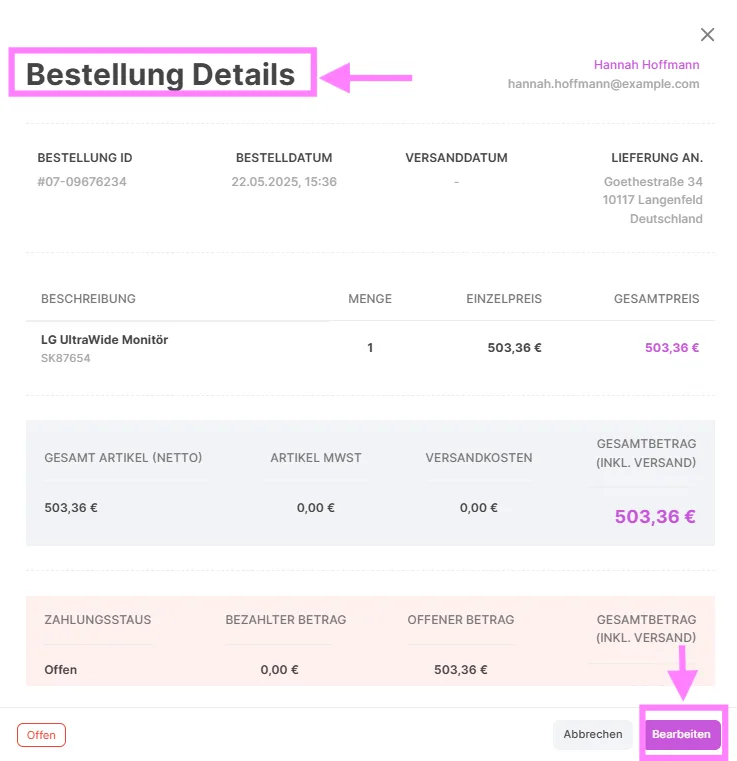 | Information in the Table
|
LABEL
To create a label, please click the "+" icon.
Create Label
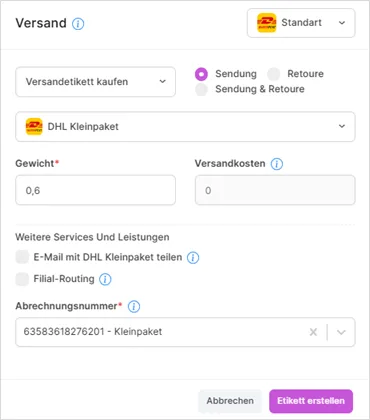
The previously configured shipping profile is automatically displayed in the window that opens. After the necessary checks, all you need to do is click "Create Label".
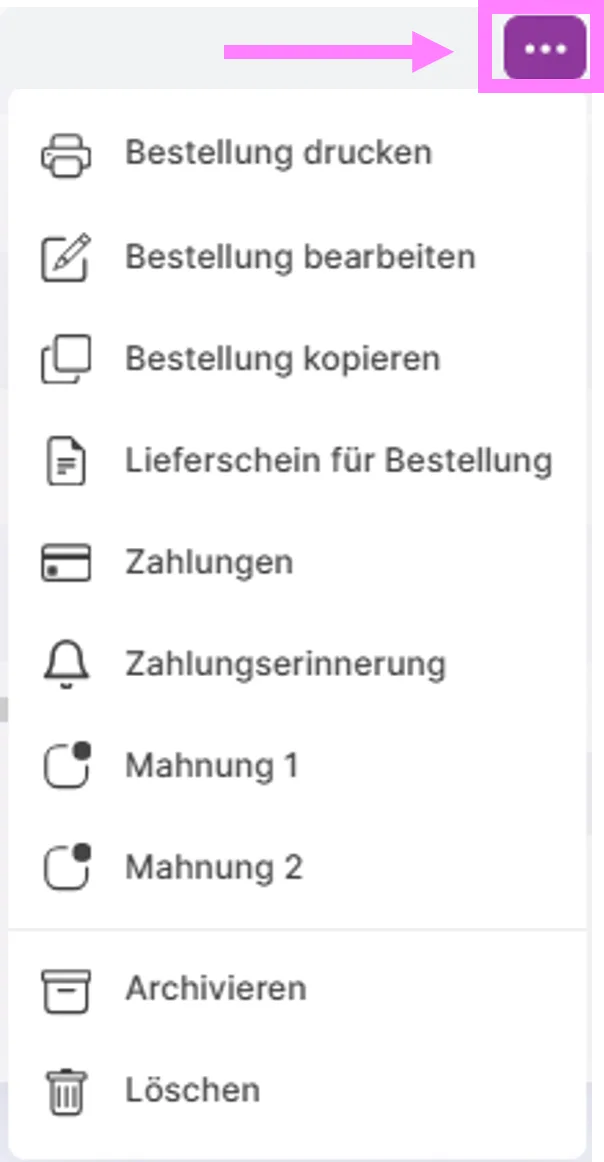 | When you hover the mouse over the relevant order, you'll see a three-dot icon on the right. Clicking it opens a dropdown menu where you can perform actions for that order.
|
 | You can manually create orders yourself by clicking the 'New Order' button. |
On the following page, you can use the search box in the Search Customers section to find and select a customer from your customer list and create an order for them.
New Order
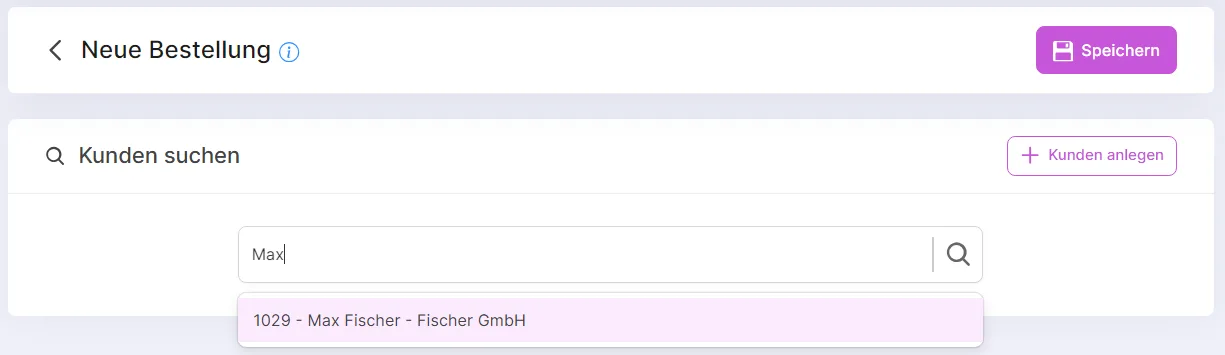
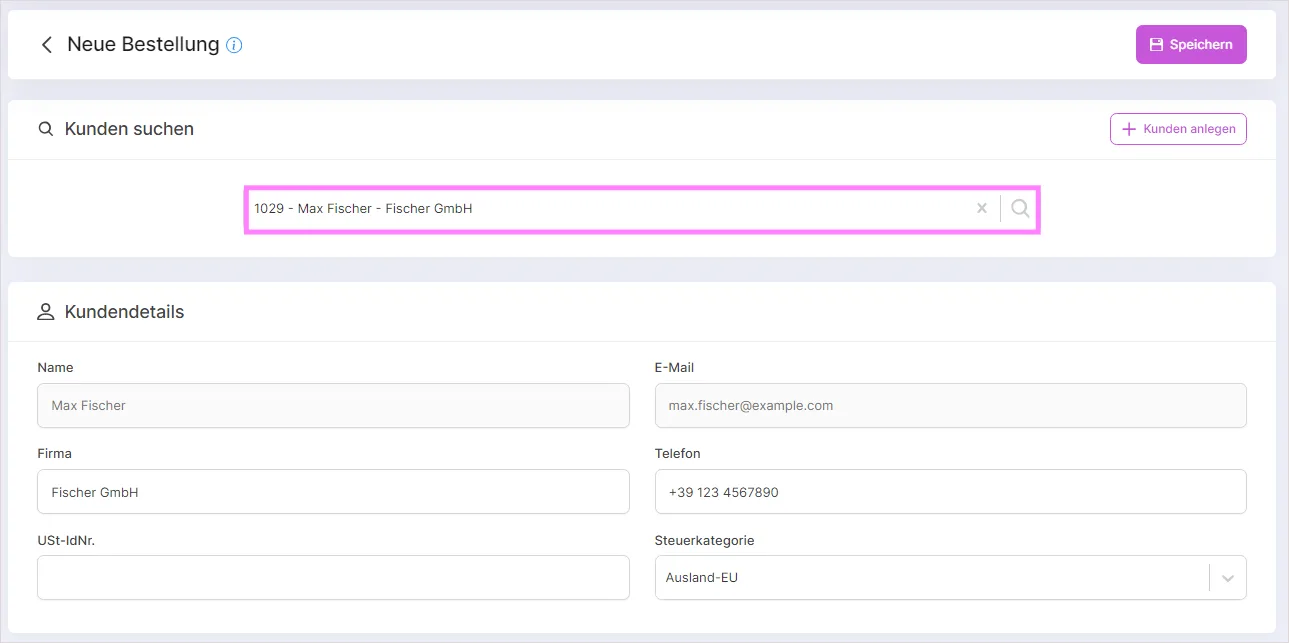

For customers who are not in your customer list, you can create a new customer using the 'Create Customer' button (the customer information entered here is automatically added to your customer list).
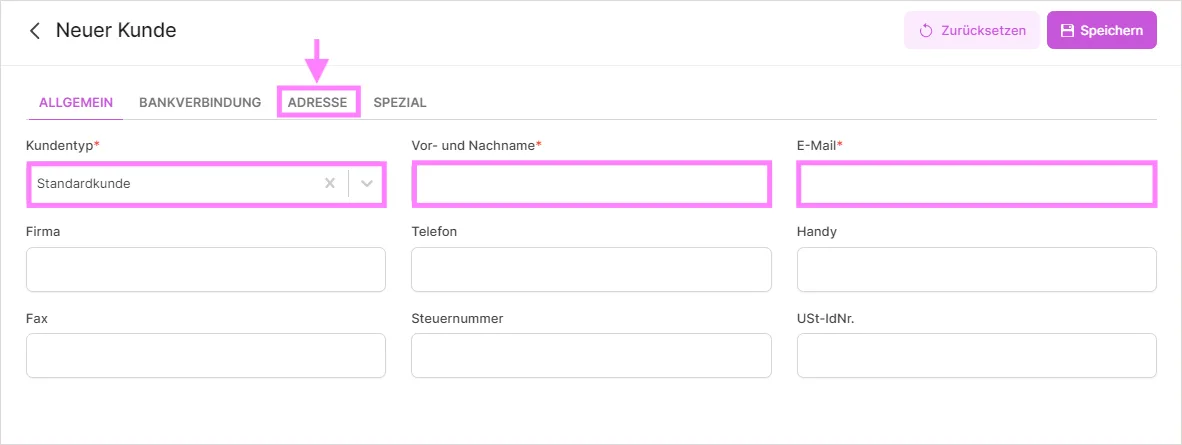
In this area you can reorganize the customer data, billing address, and delivery address. Please note, however, that these edits apply only to the order. Changes to the customer data here do not affect your list in the 'Customers' section.
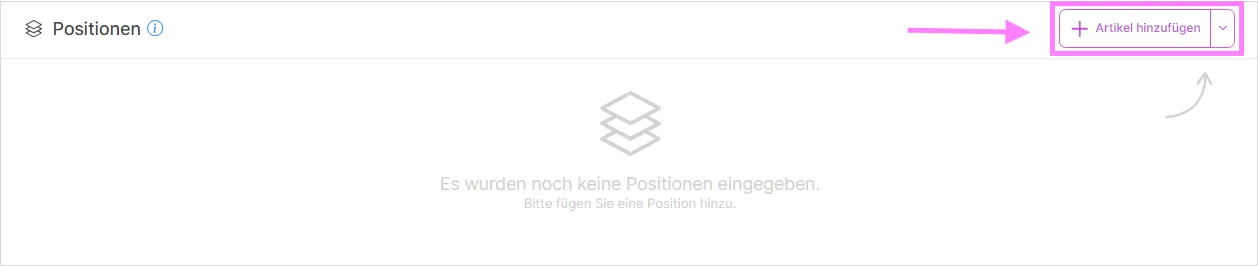
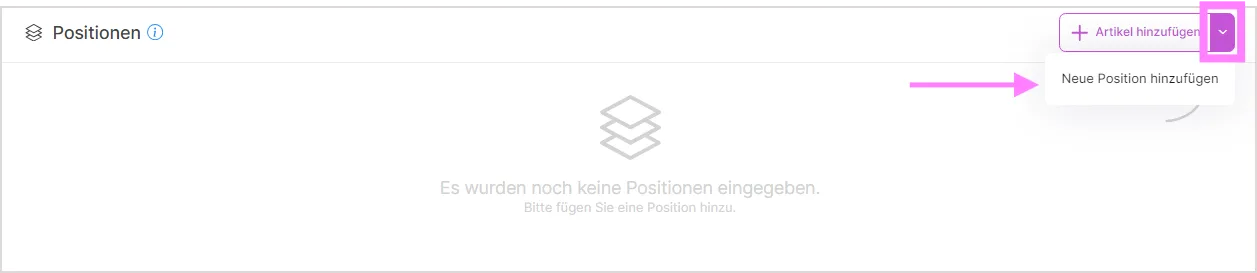
This area shows the line items for your document. By clicking the "Add Item" button on the right, you can select and add items from your Catalog > Items section. If you have no items in your item list, you can add a new line item by clicking the ' ▼ ' icon next to the "Add Item" button. After adding line items, you can make changes by double-clicking the respective field. You can also delete line items you've added using the delete button on the far right of the list.
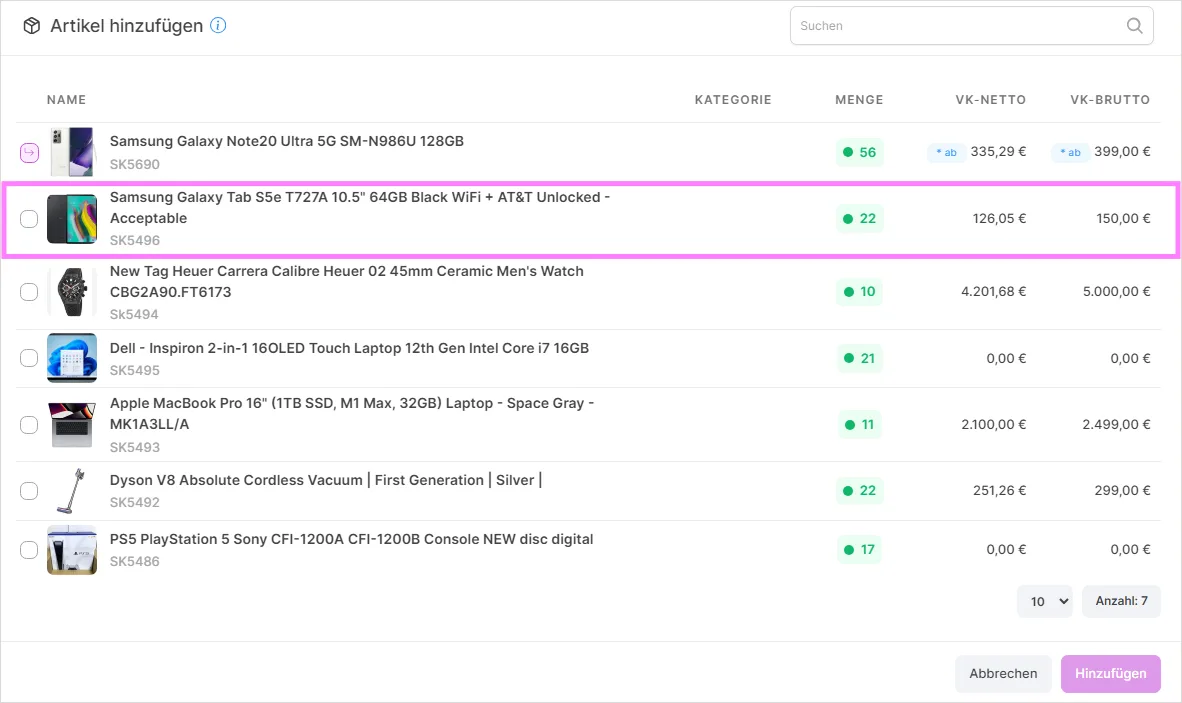
This area shows the products you have created in the Catalog > Items section.
- You can search by name using the search field below.
- You can select the desired products by clicking the checkboxes to the left of the product name.
- If your product has variants, an arrow icon ' -> ' is shown next to the checkbox. You can click this icon to select variants of your products. After selecting, you can add the products to the line items by clicking the 'Add' button at the bottom of the page. Please make sure the quantity of selected products is greater than 0.
- You can edit the quantity of your products in the Catalog > Items area.
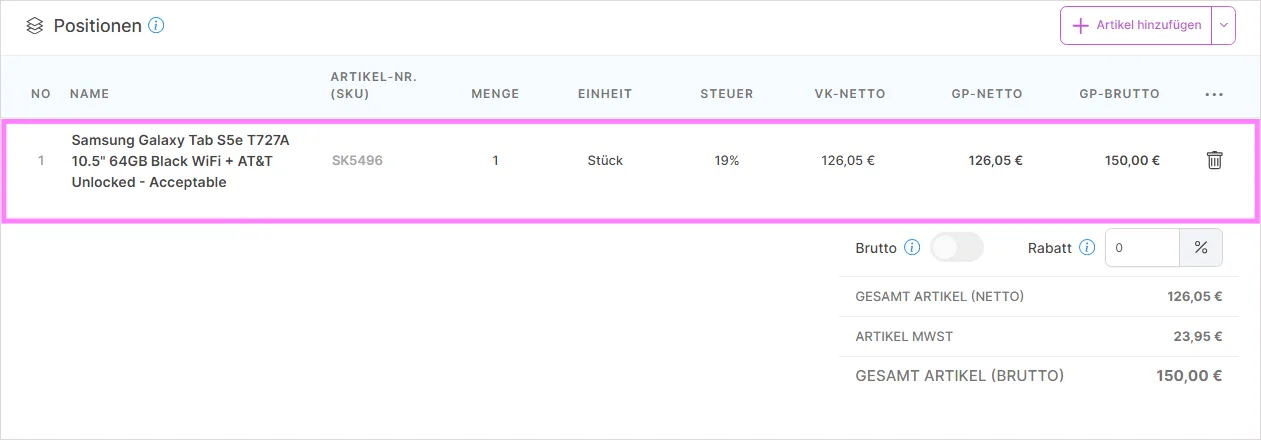
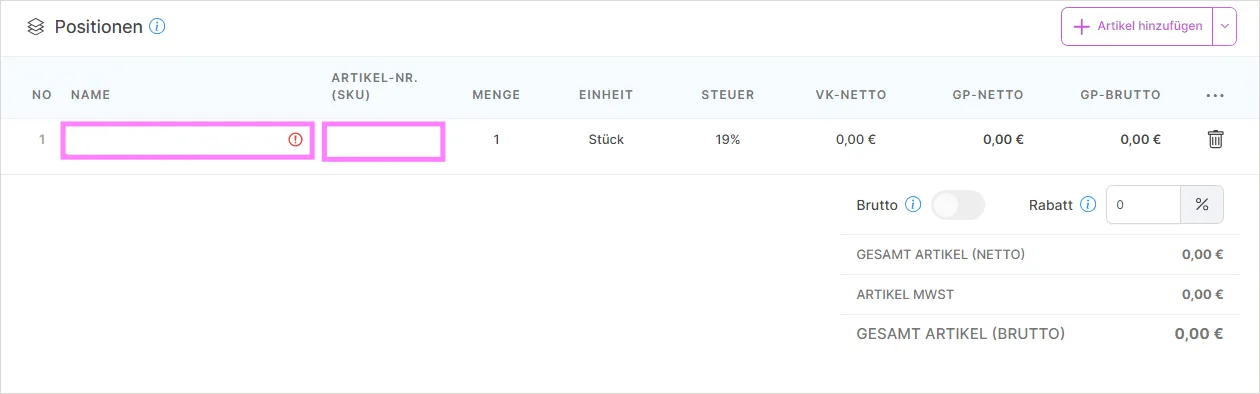
If you click the highlighted area in the image below, you can manually add a product that did not previously exist in SaleVali.
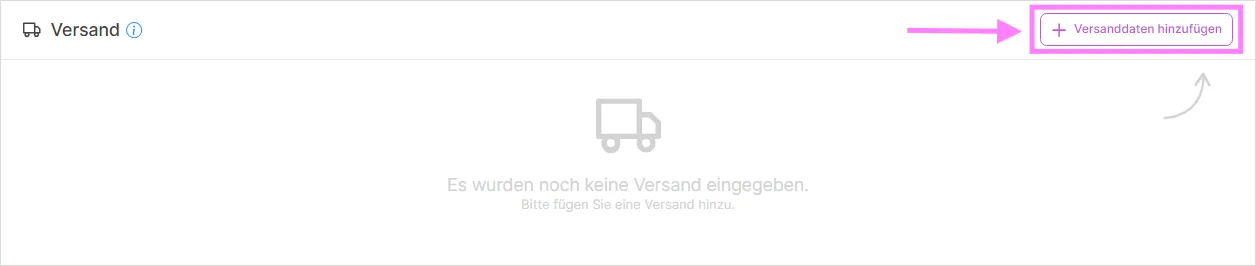
In the area below, you can add shipping details by clicking the 'Add Shipping Details' button on the right side of this area. In the Settings area, you can also go to the order settings and specify a default shipping method and shipping price.
The area below shows the payment information for your orders. If your order has been paid, you can see which method was used. If the order has not been paid, you can pay for your order in full or in part by clicking the 'Enter Payment' button on the right. Under Settings, you can set the default payment method for documents.

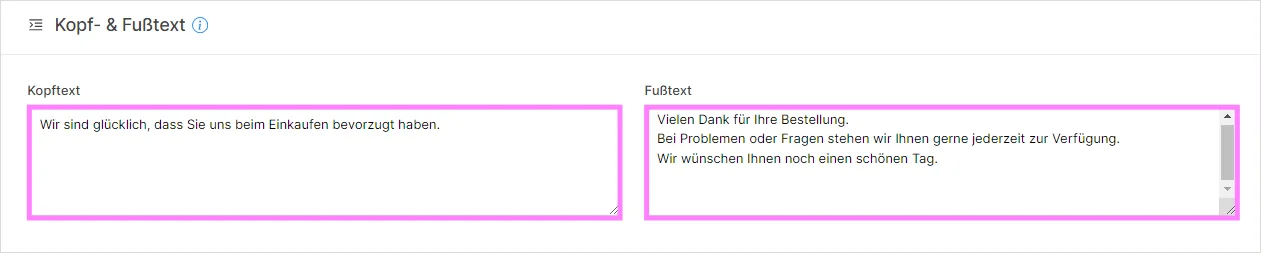
In the area below, you can separately edit the header and footer texts for documents in the settings.
KPI Summary Bar
Above the order table you'll find a summary bar with six KPI cards that show at a glance where action is needed. Each card is clickable and automatically filters the list:
- Open orders: shows all orders with status "Open".
- Cancellation requests: shows orders where a buyer has requested a cancellation that is still awaiting your confirmation.
- Not invoiced: shows open orders for which no invoice has been created yet.
- No shipping label: shows open orders for which no shipping label has been generated yet.
- Shipping errors: shows orders where an error occurred while creating the shipping label.
- Revenue this month: shows total revenue for the current month; clicking it sets the date filter to the current month.
Clicking a card resets the other filters and applies only that card's criterion, so you can quickly switch between the most important views.
Advanced Filter Panel
In addition to the simple status filter (Open/Completed/Cancelled/All Orders), a detailed filter panel is available, organized into five groups:
- Payment: Open, Partial, Paid, Overpaid.
- Document: Without invoice, Invoice to Ebay, plus individually selectable: Payment reminder sent, Reminder bill 1 sent, Reminder bill 2 sent.
- Shipping: With shipping label, With shipping error.
- Items: Single-item orders, Multi-item orders.
- Customer: Companies only, Multiple open orders (shows customers who currently have more than one open order).
These filters can be freely combined with each other. There is also a separate Shippers filter that lets you narrow the list down to the carrier actually used (e.g. DHL, DPD). It only lists carriers for which a label has already been created among your orders.
Cancelling an Order (Seller-Initiated)
You can cancel an order yourself, even without a prior cancellation request from the buyer. Open the "Cancel order" action from the order's three-dot menu.
- In the dialog, select the positions to cancel. Using "Select all" cancels the entire order.
- Choose a cancellation reason. The available reasons depend on the order's marketplace (e.g. Kaufland, Shop Apotheke, Amazon, eBay, Hood) and differ by channel.
- The "Restock inventory" option adds the quantity of the cancelled positions back to your stock and pushes it to the connected marketplaces/shops. Leave it unchecked to keep stock unchanged.
- Some marketplaces don't support partial cancellation. In that case, only the whole order can be cancelled.
- An order that has already been invoiced or already completed/shipped can no longer be cancelled this way; create a credit note instead.
Accepting a Cancellation Request
When a buyer requests a cancellation through the marketplace, the affected order gets the status "Cancellation requested". Use the "Accept cancellation" action to process one or several such requests at once:
- Select the affected orders and open the "Accept cancellation requests" dialog.
- The system shows, for each selected order individually, whether the cancellation could be accepted.
- Once accepted, the order moves to "Accepted — awaiting marketplace confirmation" until the marketplace finally confirms the cancellation.
- Orders that are already cancelled, have no pending cancellation request, or belong to a marketplace not yet supported are flagged accordingly and skipped.
Combined Shipment
If you want to ship several open orders from the same customer together, you can merge them into a Combined Shipment. Select two or more open orders and use the "Combined Shipment" action, which creates a single shipping label for all selected orders.
This requires that the delivery addresses of the selected orders match; if they differ, the system warns you and you must align the addresses before a shared label can be created. The total weight of the shipment is calculated automatically from all included positions but can be adjusted manually if needed.
Special Cases When Completing Orders
When completing orders (see Basic Functions above), SaleVali automatically checks for the following special cases:
- Label errors during bulk completion: If a multi-selection contains orders with invalid shipping labels, the system lists these orders separately. You can choose to skip the invalid orders or continue completing all selected orders anyway.
- Duplicate invoice protection: If a document (e.g. an invoice) has already been created for an order, completing it again shows a notice that this document already exists before you can proceed, preventing accidental duplicate invoices.
- Stock check for digital products: If the order contains a digital product whose license key has already been emailed to the customer, the system additionally asks whether the stock quantity should be updated when you complete the order.
Managing Payments
Payment Dialog
From an order's three-dot menu or its edit form, the "Payments" action opens a complete overview of the payment terms:
- A table with the order's payment history.
- A running summary showing the total amount, the amount already paid, and the remaining outstanding amount.
- The "Enter payment" form for recording a new payment: payment date, payment method (e.g. Transfer, Purchase on bill, Direct debit, EC-card, Credit-card, Cash on delivery, Financial/hire purchase, Cash payment, Prepayment, Other), and the amount paid. The amount can't exceed the remaining outstanding amount, which lets you record partial payments cleanly. The payment status then automatically switches between Open, Partial, Paid, and Overpaid.
Reminder Levels: Payment Reminder → Reminder Bill 1 → Reminder Bill 2
For unpaid or partially paid orders, the three-dot menu offers three sequential reminder stages: Payment reminder, Reminder bill 1, and Reminder bill 2. These must be sent in this order:
- Before the first reminder bill, you must have already sent a payment reminder to the customer.
- Before the second reminder bill, reminder bill 1 must have been sent first.
- The system prevents the same reminder stage from being generated twice for the same order, and warns you if that stage was already sent on a given date.
For each stage you can customize the "Before text" and "After text", and optionally set a reminder fee that is added to the outstanding amount. Use "Send email & preview print" to send the reminder to the customer directly.
Using the Document group filter (see above), you can search specifically for orders where a payment reminder, reminder bill 1, or reminder bill 2 has already been sent.
Tax Category Detection
When creating or editing an order, SaleVali automatically determines a suitable tax category based on the customer's country and VAT ID. The available categories include:
- Inland
- Inland (B2B)
- Abroad
- Intra-EU
- Intra-EU (OSS)
- Intra-EU (B2B)
- Turnover-free for small businesses
- Differential taxation
If changing the customer or address data causes the suggested tax category to change, SaleVali shows a confirmation dialog before the new category is applied, so that you stay in control of the tax classification of every order.
Video Tutorials
SaleVali Orders
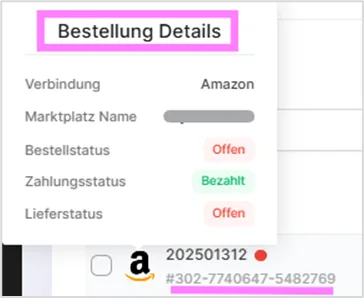
Order Information from the Marketplace
Viewing Orders on One Page
Creating New Orders
Copying Orders
Can I Complete Orders All at Once?
Viewing Payment Information for Orders
Viewing Orders Without an Invoice
Handling Incorrect VAT Rates in Orders
Creating a Shipping Label
Creating Multiple Labels for One Order at Once
Creating Return Labels
Was this article helpful?
Thanks for your feedback!